Program settings (also known as Preferences) are available in three locations:
The Malwarebytes Application menu, at the left edge of the Mac Menu Bar.
The Malwarebytes menu, in the right portion of the Mac Menu Bar.
From the Settings button on the left side of the Malwarebytes program interface.
Program settings are divided into three sections.
Click Settings in the menu panel to access settings to access settings.
The screen is divided into three sections.
We will describe each below.
General
The default tab when you open Settings is the General tab.
You will note that General is highlighted in blue, indicating it is the selected settings group.
Available settings are:
Default action for PUPs determines the action taken on PUPs. The default option is to Quarantine PUPs, although you may also choose to Skip processing instead. This would exclude PUPs from scans. You may still quarantine PUPs by selecting them after a manual scan.
Automatically check for protction updates may be selected or deselected. We strongly recommend that you select this option in order to benefit from the most current database updates. When selected, the Check every setting allows updates to be scheduled for once an hour (the default) up to once per 24-hour day (in 5 discrete steps).
Hide application icon will cause the application icon in the menu bar to not be displayed. This setting is unchecked by default.
Beta Application Updates will cause the application to download beta (pre-release) updates in addition to normal releases. This setting is unchecked by default. Upon enabling this setting, you will receive an additional screen to confirm your choice.
Usage and Threat Statistics will cause the application to send anonymized data from the application to us for analysis. This data helps our researchers and engineers improve the product and help protect you. For a full list of information that is collected, please see the Malwarebytes Privacy Policy.
My Account
The My Account tab has three variations.
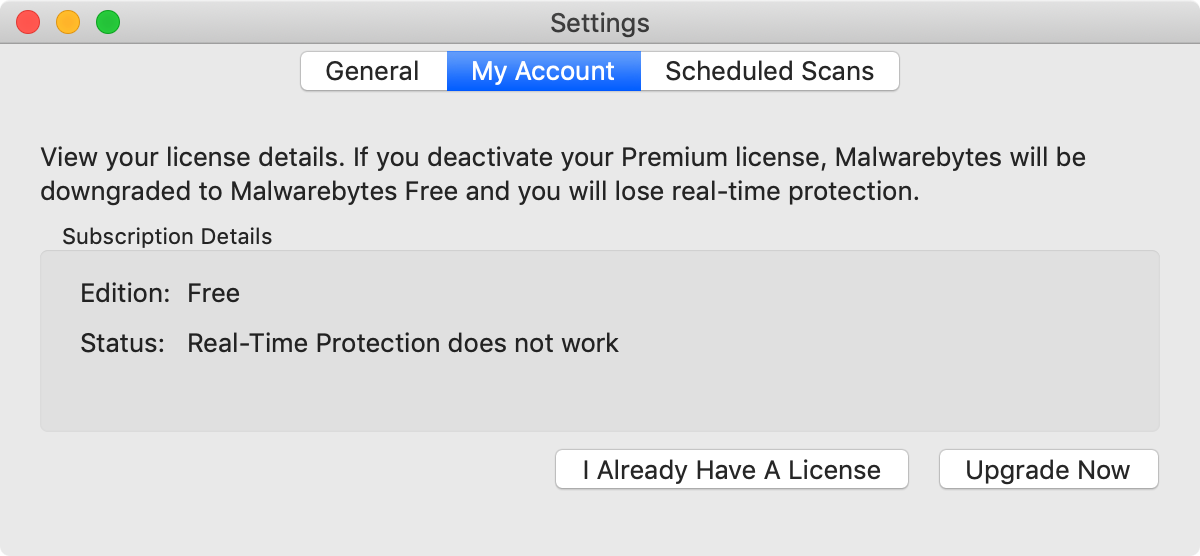
The first variation is for Free users.
This screen allows you to start a Premium Trial, enter a Premium License, or purchase a Premium license.
You will only be able to start a Premium Trial if one is available to you.
The second variation is for Trial users.
It offers the opportunity for the user to purchase a license, to enter a license that they have already purchased, or to deactivate the Trial.
If you deactivate your trial, you will no longer be able to use Real-Time Protection, and you will not be able to resume the Trial at a later time.
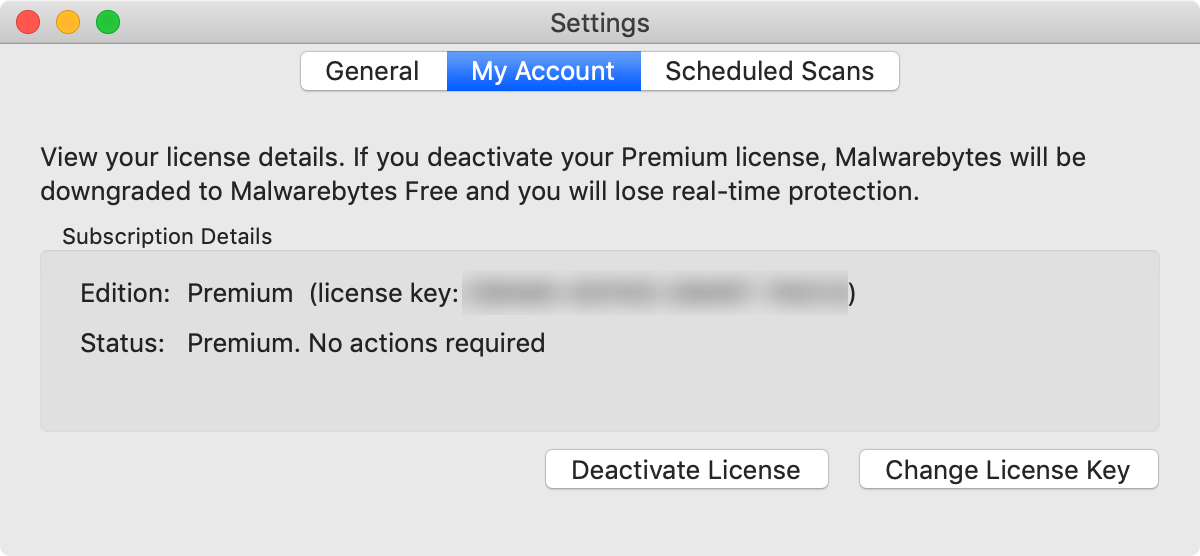
If you are using the Premium version of Malwarebytes, a slightly different screen is shown.
This version takes into account that you have already purchased a license and will display your license key, should you require it.
The three buttons at the bottom are replaced with the Change License Key button, and the Deactivate License button. The screen is shown here.
Scheduled Scans
The final tab is Scheduled Scans.
This tab allows you to configure Malwarebytes to run scans on a defined schedule.
Scheduled scans help to provide more comprehensive protection on your device.
Trial or Premium users may add and configure several scheduled scans simultaneously.
Free users may only enable or disable a single, default scan.
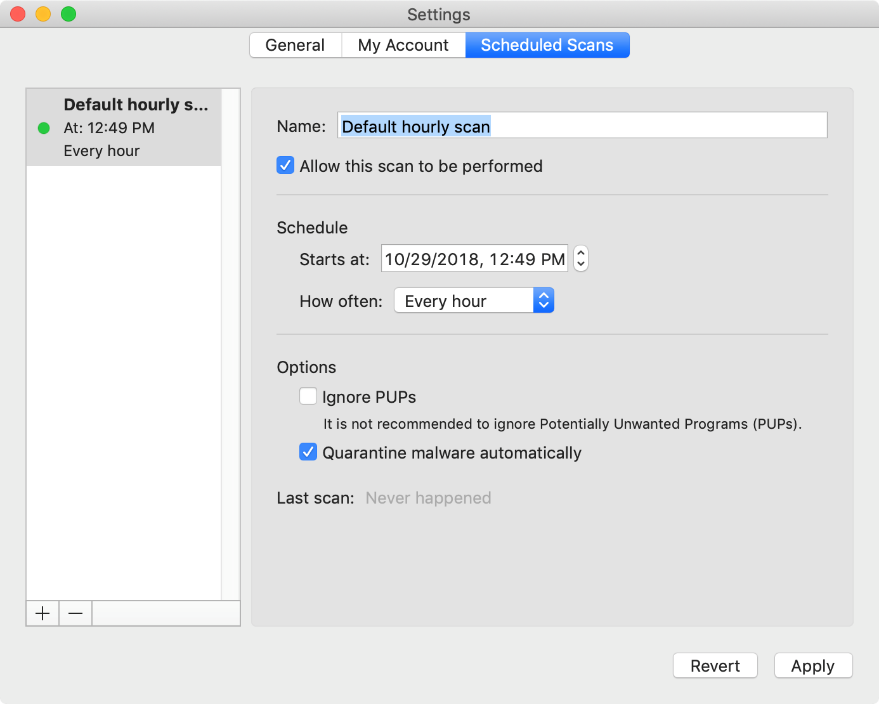
The available options for Scheduled Scans are:
Name: Provide a name for the scheduled scan to help organize it among any others you have.
Allow this scan to be performed: Checking this box will enable the scheduled scan. If you do not want the scan to run, simply uncheck this box to maintain all other scan settings.
Starts at: Select the time of date and time that you wish the first scan in the series to run
How often: Select the frequency of the scan.
Ignore PUPs: If you select this, PUPs will not appear in the scan results and Malwarebytes will take no action on them as part of the scheduled scan. This is not selected by default when adding a scheduled scan.
Quarantine malware automatically: This option will allow the scheduled scan to perform a quarantine action on any malware found as part of the scan. You will not be able to review the files detected before the quarantine occurs. This is enabled by default when adding a scheduled scan.
You may add a new scheduled scan by clicking the plus sign (+) at the bottom left of the list of scan names.
You may remove a scheduled scan by clicking the minus sign (-) button.
Trial and Premium users can create any number of scheduled scans.
If you are a Free user, you will only be able to use a complimentary monthly scan.
You are able to change the scan day or time, and you may disable it, but you cannot change any other settings or create new scans.