
The Scan option is available from the Malwarebytes Menu Bar. There are two screens directly associated with this option. The screen shown below is your initial view into this option.
If you are a Premium user or are taking advantage of the Trial offer, there is a Scan Scheduler link at the bottom right corner of this screen, allowing you to configure a scheduled scan. This feature is discussed in the Settings section of this guide. There are three types of scans which can be selected and executed here. Let's talk about each...
Threat Scan
This method of scanning detects a large majority of threats that your computer may be faced with. Areas and methods tested include:
Custom Scan
You may also choose to run a custom scan. A custom scan allows you to scan according to specifications which you define at the time of the scan. All other Malwarebytes scans are performed according to a set of specifications which you define in Settings. Here, you can run a "one-off" if you wish. A screenshot of the custom scan configuration screen is shown below.
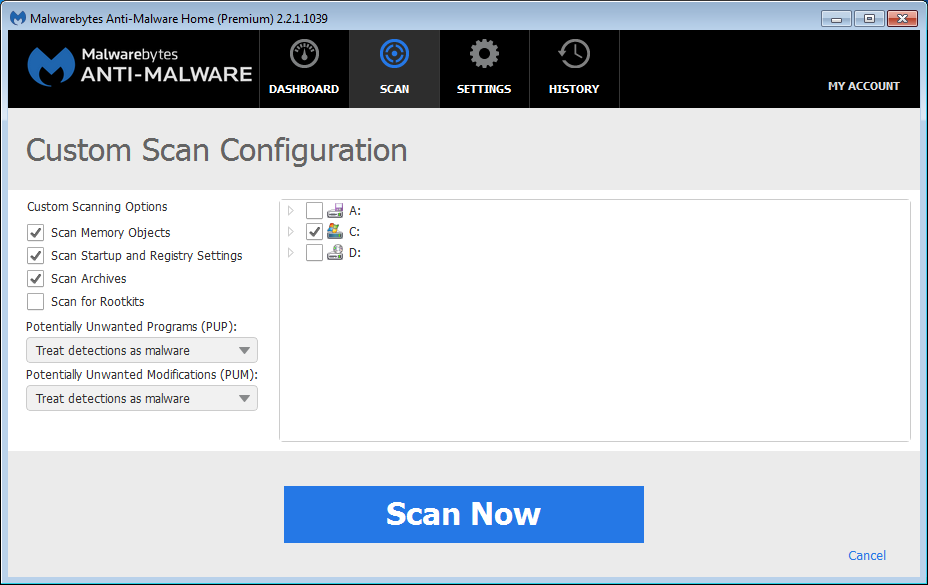
Custom scanning options (left side of the screen) have been discussed somewhat in the text above, and are discussed much more fully in Settings later in this guide. An important feature to note here is the ability to specify certain areas of your file system for scanning, using a Windows Explorer-like presentation model. In the screenshot below, one specific directory has been excluded from scanning by unchecking it.

You will notice that the checkbox for C: is now filled by a square instead of a checkbox. This indicates that some of this drive (but not all) will be scanned. You may have your own reasons why certain directories should be scanned or ignored, but Malwarebytes Anti-Malware gives you the ability to make that choice.
Hyper Scan
This scanning option is only available to users of Malwarebytes Anti-Malware Premium and Trial versions. This method of scanning is limited to detection of immediate threats. Areas and methods tested include:
While a Hyper Scan will clean any threats which have been detected, we strongly recommend that a Threat Scan be performed if a Hyper Scan has detected threats.
Watching Scan Progress
The three types of scans which may be executed each require a certain amount of time to complete. The custom scan is highly variable because the time required is completely dependent on the number of locations — and the number of files in those locations — which must be scanned. We have redesigned the scan screens to help you see the progress of the scan as it is taking place. Refer to the screenshot below for an example of an in-process scan screen.
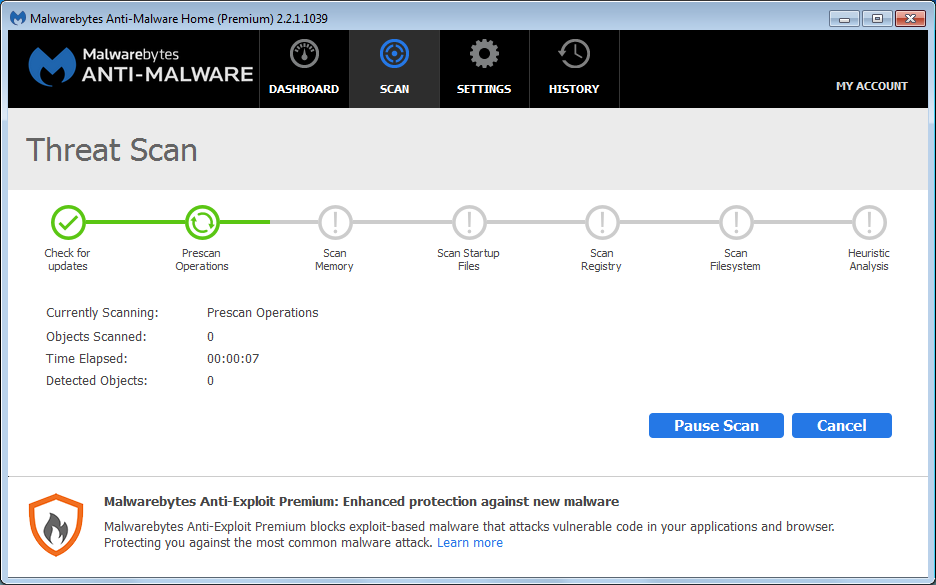
The progress bar shows milestones for each phase of the scan, with each milestone being represented by a green or gray symbol. The first milestone in the above screenshot contain a green checkmark, indicating that phase of the scan has been completed. The second milestone is represented by an animation which indicates that this phase of the scan is currently being performed. The last five milestones — all shown by gray exclamation points — are phases of the scan yet to be completed. As you run a scan, you will see this progress bar changing, until finally the scan completes.
You may also pause a scan while it is in process by clicking the Pause Scan button. Doing so produces the result shown in the following screenshot.

As shown here, five phases of the scan had been completed, and the Pause Scan button was pressed while the file system was being scanned. Click Resume Scan to continue the scan where it left off. You may also click Cancel at any time to terminate the scan. Results of the scan will be reported as if the scan ran to completion.
Scan Results
After a scan has been executed, a different page is displayed. Here, we see the display when no threats were detected.

When threats are detected during a scan, the user must decide how these threats should be handled. The following series of screenshots detail this flow. In the first screenshot, two threats have been detected. By default, all are selected for removal. Please note thet the total number of detected threats is shown above the list of threats, and the number of threats that have been selected for removal is shown in red on the same line (near the right edge of the screen).
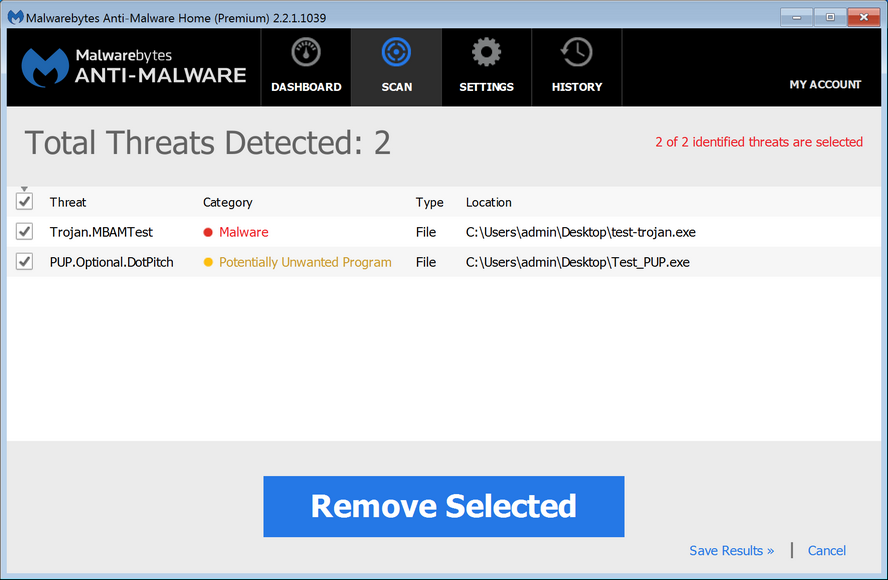
In order to demonstrate the behavior of this screen, we will uncheck the second threat. This indicates that only the first threat is to be removed. Clicking the Remove Selected button results in the screen shown below.
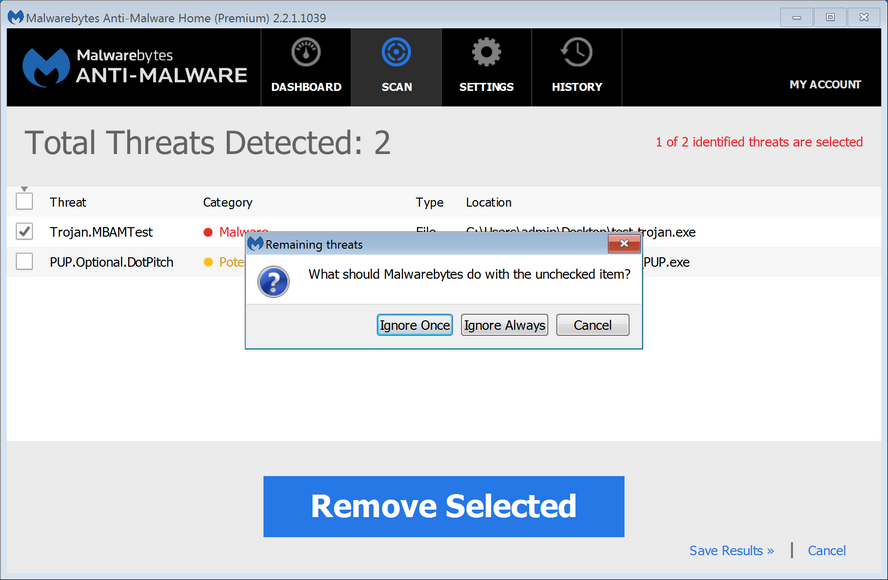
The threat that was not selected still requires remediation, based on input supplied by the user. In this case, the choices available are Ignore Once, Ignore Always and Cancel. Clicking the Ignore Once button temporarily ignores the threat, although it will be shown as a threat on subsequent scans. Selecting Ignore Always results in the threat being added to the Exclusion List. It would not be scanned in the future. Clicking Cancel keeps you on this screen until you choose how to handle the detected threats. Once a disposition has been selected for all detected threats, the screen below will be displayed.
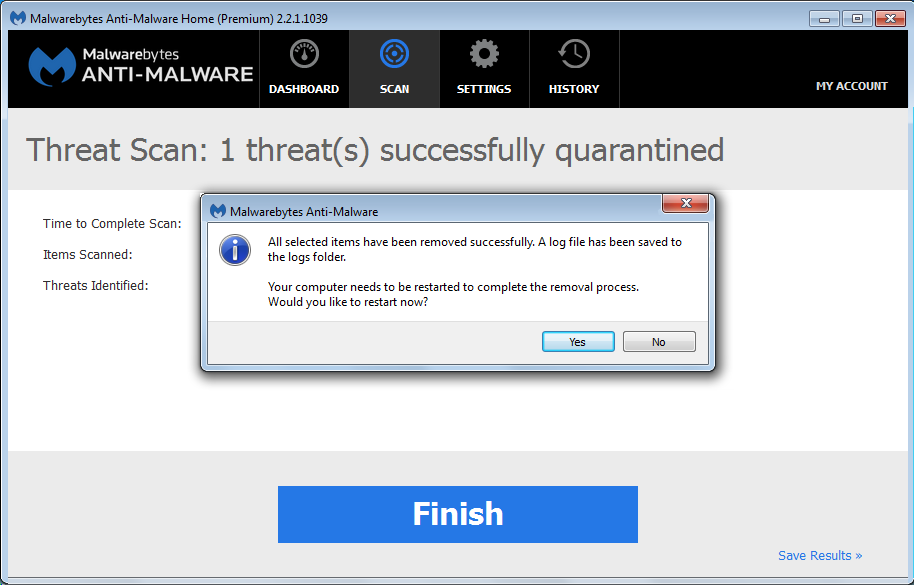
Although a threat has been quarantined, you must restart the computer to assure the threat removal process is complete. If you choose to wait on the restart, you will be reminded.
Scan results are available in Scan Logs which are retained by Malwarebytes Anti-Malware (see History Settings for further details), or click the Save Results link at the bottom right corner of the screen to save results to your clipboard (for use with other programs), to a text file, or to an XML file. You can also view Scan Logs from within the Malwarebytes Anti-Malware user interface. See Application Logs for details on viewing logs.